
Find below a couple useful pieces of information and explanations for getting started programminng for the FIRST Tech Challenge.
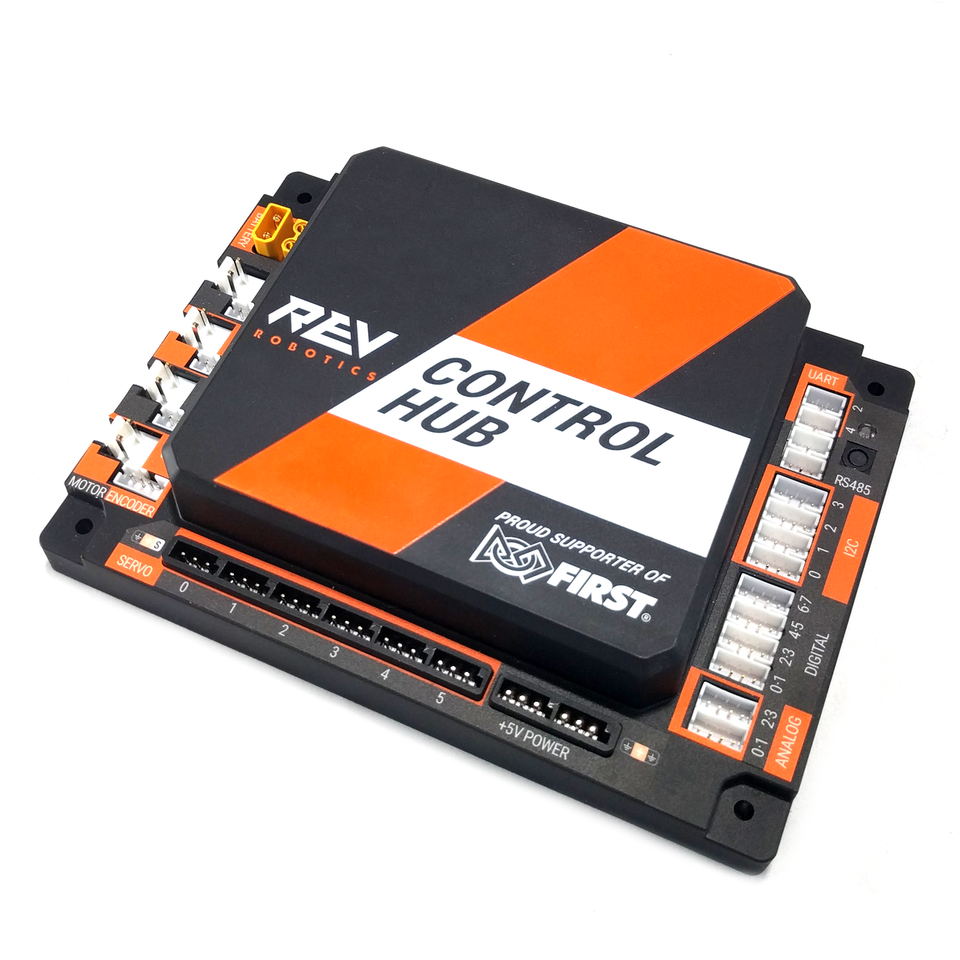
The Control Hub
The REV Control Hub is “brain” of your robot and emits the Wi-Fi signal used to control, update and communicate with the robot. Hardware will plug into the REV Control Hub (and REV Expansion Hub).
 The Control Hub (courtesy REVRobotics.ca)
Code can be uploaded to the REV Control Hub directly through USB connection or over Wi-Fi using OnBot Java or Android Data Bridge.
IT IS IMPORTANT THAT PRIOR TO COMPETITION (OR WHEN YOU RECIEVE YOUR CONTROL HUB) THAT YOU CHANGE THE NAME AND PASSWORD (see this helpful tutorial covered by the FIRST documentation to find out how)
The Driver Hub (and Driver Station)
Many teams will opt to purchase the REV Driver Hub however as of the 2025 season, a select few Android devices running Android 7 (Nougat) and beyond are also allowed for competition1
 The Driver Hub (courtesy REVRobotics.ca)
The Driver Station is an Android app available on the Driver Hub that is used to communicate with the REV Control Hub via the emitted Wi-Fi signal.
The Driver Hub is the device used to connect competition-legal gamepads. Most gamepads will connect onto one of three USB 2.0 slots available on the device.
The Driver Hub is known to have battery and charging issues that can be resolved using :paper or tape.
IT IS ALSO IMPORTANT THAT PRIOR TO COMPETITION (OR WHEN YOU RECEIVE YOUR DRIVER STATION) THAT YOU CHANGE IT’S NAME (see this helpful tutorial once again by the FIRST documentation to find out how)
Further the REV Control Hub and Driver Hub are able to updated using the REV Hardware Client. For more in-depth information in general about the Control Hub and Driver Hub see the REV documentation.
Structure of Code
If you examine any sample/example provided by FIRST, they all follow a similar pattern.
Every .java file featured is structured as an :“OpMode”. Some OpModes are linear (called linearOpModes) while some are iterative (just called OpModes), see their differences here. However functionally they perform the :same
@TeleOp // <-- This Java annotation specifies that this OpMode is for the player controlled period
public class OPMODE_NAME extends OpMode { // <-- "..extends OpMode" specifies that it is ITERATIVE
    ...
}
@Autonomous // <-- This Java annotation specifies that this OpMode is for the autonomous period
public class LINEAROPMODE_NAME extends LinearOpMode { // <-- specifies that it is LINEAR
    ...
}
:x Fixing Battery Issues
REV has official documentation to help resolve battery-related issues. See link below.
:x What is an OpMode?
See this explanation from REVRobotics!
https://docs.revrobotics.com/duo-control/hello-robot-java/where-to-program/what-is-an-opmode#opmodes
:x Personal Preferences on OpModes
As an aside, as a programmer I tend to prefer using Linear OpModes for Autonomous while using Iterative OpModes for TeleOp.
You can think of Linear OpModes as a list of instructions to perform (which is similar to the goal we’re trying to achieve in Autonomous)
While in TeleOp (Player-Controlled period), we want to continuously perform checks and run code in a loop (or iteratively).
Every OpMode has to be structured in the same way, without certain lines of code, when our robot is compiled our opModes will not show up.
:x End Nutshells
Footnotes
-
See R704 in the Game Manual. ↩
Check out this article next!